There are so many articles on how to install ceph with ceph-ansible. Sadly, as ceph versions change, so does the process for installation. This distinction is rarely made within in the instructions and because of that, the install is doomed to fail and the installer disenfranchised.
This article should provide the process needed to install on CentOS 7 ceph nautilus (v14.x.x) edition, which is actively maintained as of December 14, 2020. There is a newer version, Octopus (v15.x.x).
Preparation
This article will make the following assumption that you already have prepared and configured four servers to act as your monitor (mon1) and three (osd1,osd2,osd3) osds. The following article will detail the preparation.
ceph: Prepare the environmentSetup
For each of the servers, the /dev/sda drive is the OS drive. The /dev/sdb, /dev/sdc, and /dev/sdd drives are the additional drives found on each of the osd servers. For the sake of argument, it would be best that each of the drives are the same on each of the osds. The cluster can be created with differing drive sizes, but for the sake of this example, each drive is of the same size, 32 GB each.
Install
# CentOS7
yum install ansible git python-netaddr -y
# CentOS8
yum install ansible git python3-netaddr -y
su - ceph
git clone https://github.com/ceph/ceph-ansible.git
sudo mv ceph-ansible /usr/share/ceph-ansible
sudo cp /usr/share/ceph-ansible/site.yml.sample /usr/share/ceph-ansible/site.yml
sudo ln -s /usr/share/ceph-ansible/group_vars /etc/ansible/group_vars
Configure ansible.cfg
Modify the /etc/ansible/ansible.cfg file to allow for host_key_ckecking equal false by uncommenting the line. ‘sudo vim /etc/ansible/ansible.cfg‘
host_key_checking = FalseCreate Inventory file
/etc/ansible/hosts
[mons]
mon1.it.megocollector.com

[monitoring]
mon1.it.megocollector.com

[mgrs]
mon1.it.megocollector.com

[rgws]
mon1.it.megocollector.com

[osds]
osd1.it.megocollector.com
osd2.it.megocollector.com
osd3.it.megocollector.com
Configure all.yml
The all.yml file must be placed at /etc/ansible/group_vars.
ceph_origin: repository
ceph_repository: community
ceph_repository_type: cdn
ceph_stable_release: nautilus

public_network: 10.10.0.0/24
cluster_network: 192.168.1.0/24

#monitor_interface: ens192
monitor_address_block: 10.10.0.0/24
radosgw_address_block: 10.10.0.0/24

# Haven't got this to work yet, but these two statements eliminated many errors.
# Reference the /usr/share/ceph-ansible/group_vars/roles/ceph-defaults/defaults/main.yml to see defaults
# user: admin
dashboard_admin_password: cephpass
grafana_admin_password: cephpass
Configure osds.yml
As with all.yml this file must be placed at /etc/ansible/group_vars.
osd_scenario: lvm
osd_objectstore: bluestore
devices:
  - /dev/sdb
  - /dev/sdc
  - /dev/sdd
lvm_volumes:
  - data: /dev/sdb
  - data: /dev/sdc
  - data: /dev/sdd
Since this is a fresh installation of nautilus, bluestore is the default objectstore (osd_objectstore).The osd_scenario is lvm since it is the default for liminous or newer, nautilus. Since, the osd_scenario is selected, the lvm_volumes must defined.
Deploy
As user ceph.
$ cd /usr/share/ceph-ansible
$ ansible-playbook -i /etc/ansible/hosts site.yml
I was faced with many errors and the script stopped. To get past the errors, add ignore_errors: true to the site.yml. The excerpt below shows the added line towards the top of the script.
  gather_facts: false
  ignore_errors: true
  any_errors_fatal: true
  become: true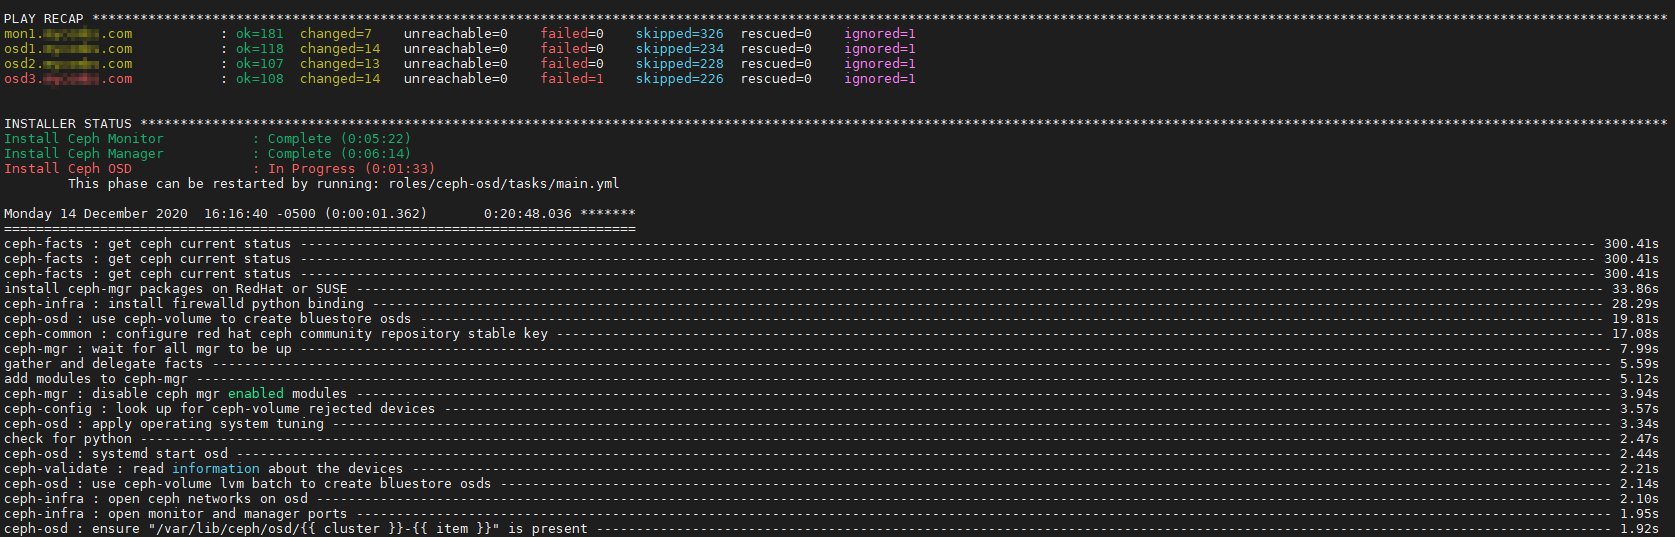
Verification
Use the following command to check the health of your newly created cluster.
sudo ceph -s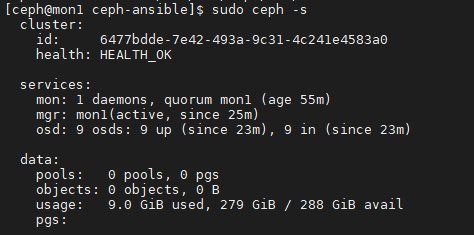
If there is an error along the way about unable to download something or cannot resolve a yum update, what worked in two consecutive tests was a “yum clean all” on the monitor box and rerun the ansible playbook.
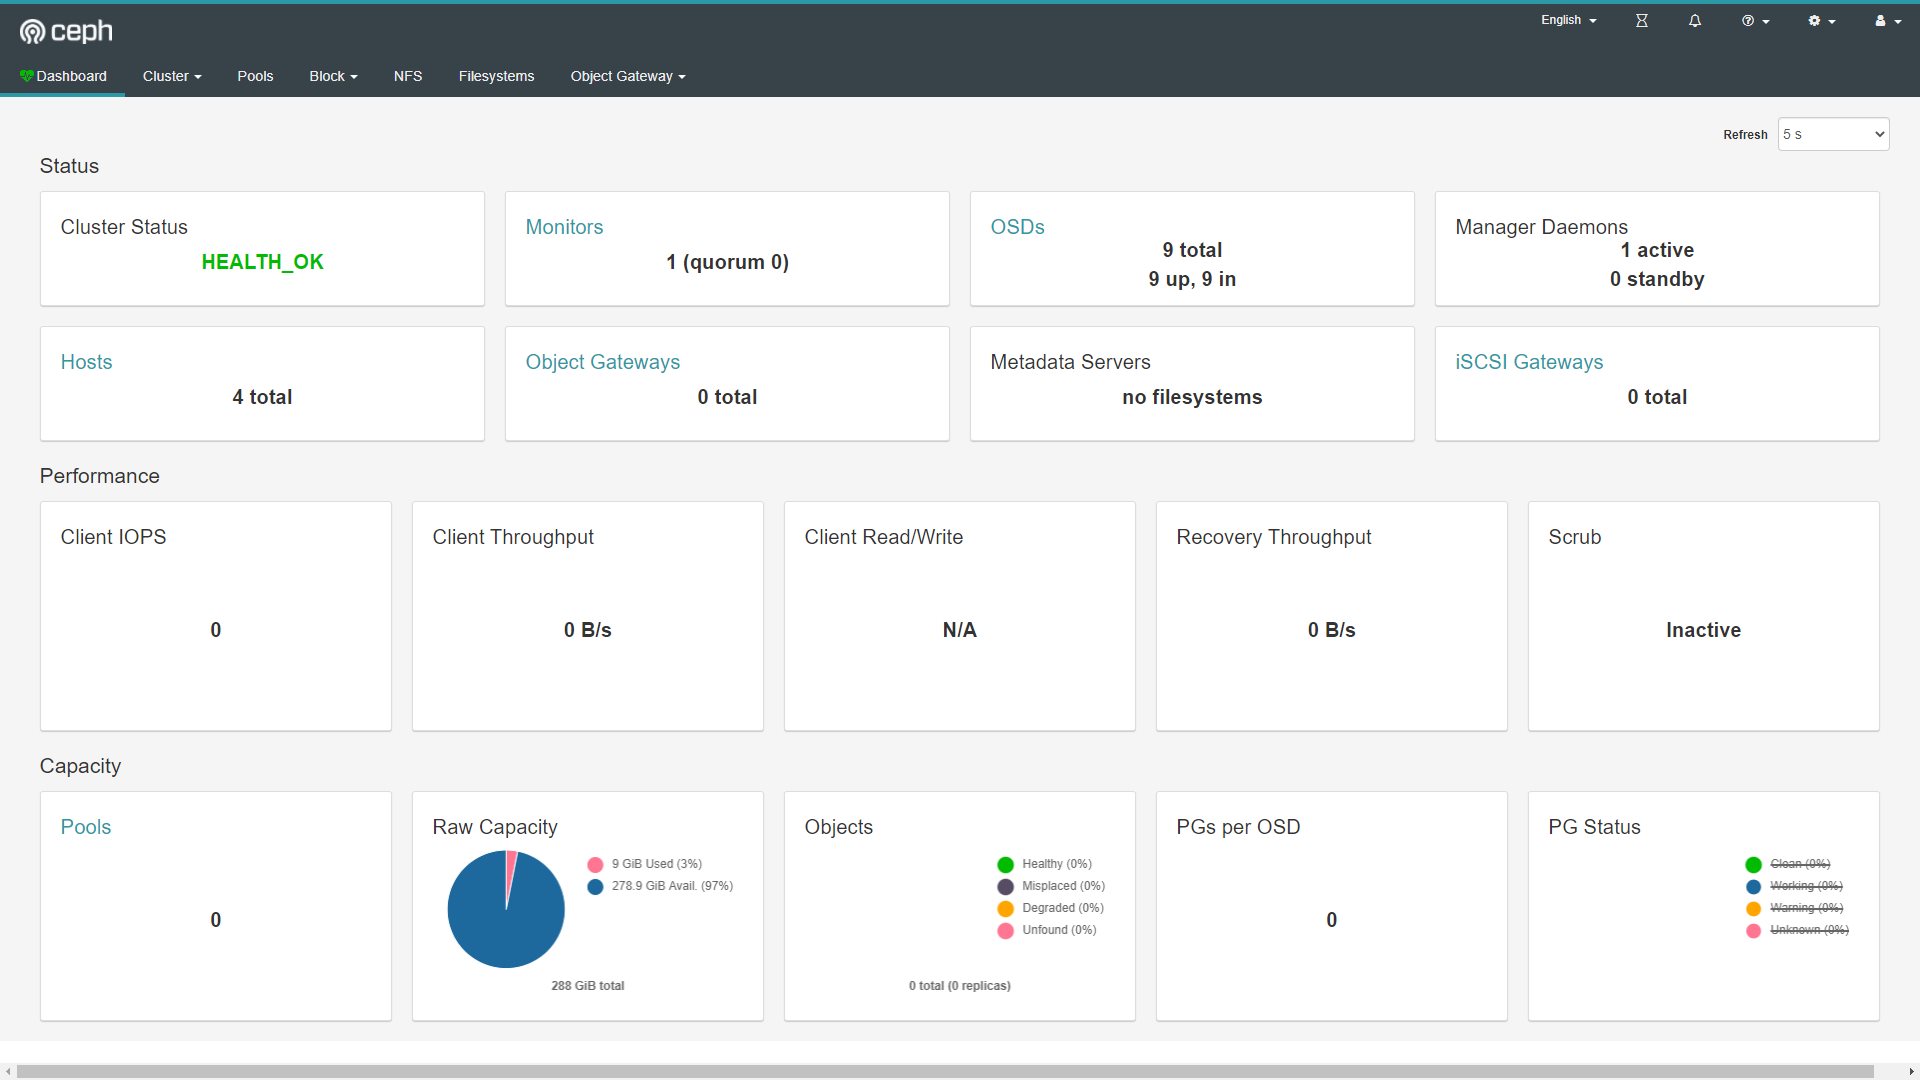
Post-Install: Dashboard
The majority of the setup of the ceph cluster is complete. The dashboard is nearly setup too. Until I figure out how to incorporate this into the ansible variables, this will wrap things up.
sudo ceph dashboard create-self-signed-cert
sudo ceph dashboard ac-user-create cephadmin password administrator

#A newer install attempt on CentOS8 had a slight difference in command
sudo echo "password" > password.txt
sudo ceph dashboard ac-user-create cephadmin -i password.txt administrator
A recent HEALTH_WARN was resolved with this command.
ceph config set mon auth_allow_insecure_global_id_reclaim falseAlthough this loads as a service, a quick reboot fixed any issue accessing the site that was had.
Go to https://youripaddress.com:8443/ and use the user cephadmin and the password password as indicated in the step above.

Source(s)
- https://docs.ceph.com/en/latest/releases/
- https://www.marksei.com/how-to-install-ceph-with-ceph-ansible/
- https://www.server-world.info/en/note?os=CentOS_7&p=ceph14&f=1
- https://docs.ceph.com/projects/ceph-ansible/en/latest/osds/scenarios.html
- https://github.com/ceph/ceph-ansible/blob/master/README-MULTISITE.md
- https://www.delltechnologies.com/resources/en-us/asset/technical-guides-support-information/solutions/red_hat_ceph_storage_v3-2_object_storage_architecture_guide.pdf